Here are some of Asa Reed’s best tips: how to choose between a vertex or fragment shader, debugging tools, and finally, his top seven key optimizations.
1Vertex or Fragment shader: which one to choose?
Vertex shader: If you’re most concerned about performance then a vertex shader is probably the best choice. Vertex shaders operate on every vertex on your mesh, whereas a fragment shader operates on every pixel within the triangles composed by these vertices.
Vertex shaders come with limits: it’s impossible to get accurate lighting data or do texture mapping in a vertex shader. However, it is possible to shift uv texture coordinates by an arbitrary amount (to achieve a sort of animated surface effect, for example) in a vertex shader, rather than a fragment shader.

An example of a model with a vertex shader, from vertex and fragment shader examples.
Lighting and surface effects in vertex shaders tend to run faster but result in lower/less visual quality/fidelity. Any operations specifically targeting geometry (vertices) should always be done in a vertex shader, for example, GPU skinning.
Fragment shader: If you’re aiming for high-end visuals or interesting surface effects, and need smooth and correct lighting then consider using a fragment shader. Always pay close attention to what exactly you are adding to your fragment shaders, and do whatever you can to simplify those operations or move them to the vertex shader.
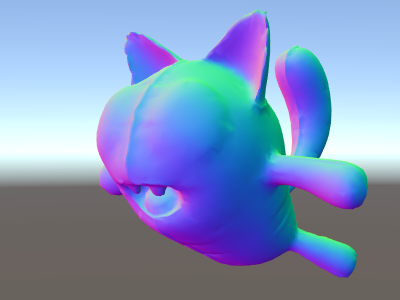
The same model with both a vertex and fragment shader, from vertex and fragment shader examples.
Specifically within Unity, take note of any #pragma defines or other uses of Unity’s built-in functionality within your shader code. While you may not think your shader should be taxing if you are just doing something simple like modifying alpha, if that same shader defines “#pragma surface surf BlinnPhong”, there are dozens of calculations being injected into your shader to calculate Blinn-Phong lighting. You can see the code those lighting defines add by looking in the lighting.cginc file in your Unity install directory. For more information see the docs Custom Lighting models in Surface Shaders.
2Profiling your shaders
Unity’s Frame debugger lets you freeze playback for a running game on a particular frame and view the individual draw calls that are used to render that frame. As well as listing the drawcalls, the debugger also lets you step through them one-by-one so you can see in great detail how the Scene is constructed from its graphical elements.
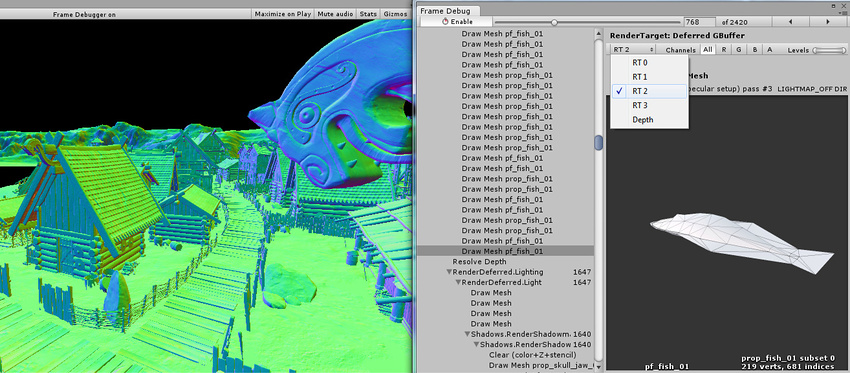
Unity’s Frame debugger
With 2017.1 we’re also including information on geometry batching and providing you with specific feedback about why a certain mesh is not batching if it is set to be batched.
There are also very good external tools for shader debugging on specific hardware:
-
For iOS and Mac OS: Xcode has a great built-in frame profiler that includes options such as capturing a capturing all the memory that the GPU is using in a specific frame; camera.render, to get to the meat of the drawing code, and drill down to see a nested hierarchy view of what’s being drawn, and the FPS tab that will show you how each shader affects the total rendering time.
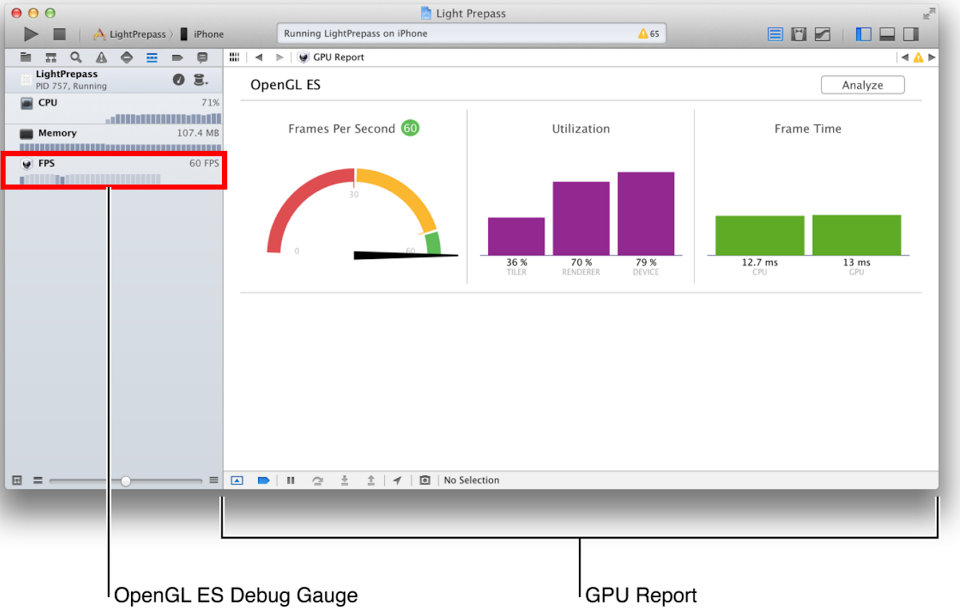
Xcode’s frame profiler
-
On PC and Mac, RenderDoc and Intel GPA tools get pretty in depth and tend to have the most hardware compatibility.
-
When debugging a specific hardware target for performance or incorrect output, such as a mobile chipset like ARM Mali, or PS4, Xbox, Nintendo Switch etc., ALWAYS grab the manufacturer’s own Frame Debugger (sometimes called Frame Profiler or Frame Analyzer). Their tools will almost always have the most accurate data for that chipset, and will likely have expanded data sets compared to the more generic tools mentioned above.
3Seven key shader optimizations
On a per-frame basis there is typically far more work being done by your shader code than your game code. Try these optimizations to help keep your performance/FPS rate nice and smooth.
-
Do less non-constant math. Use constants or “dynamic uniforms” (e.g., x=4/33, x=4xsin(24)).
-
Multiply scalar values (float, int) before vector values (float3, float4).
-
Avoid discard instruction whenever possible, including for alphatest (applies mainly to mobile). Watch your overdraws.
-
If possible keep your calculations on a vertex shader.
-
Specify a write mask for a vector operation whenever possible (if it doesn’t use all of the components of the result).
-
Avoid branching based on dynamically set values/non uniforms (if-else, loops).
-
Check the impact of operations (such as discard(), floor(), etc.) on your renderer model (OpenGL 2, OpenGL 3, OpenGL ES, etc.) and hardware.